Uploading Files
To upload a new file:
- Click the Upload file button (with paperclip icon) on the top right of the Files page
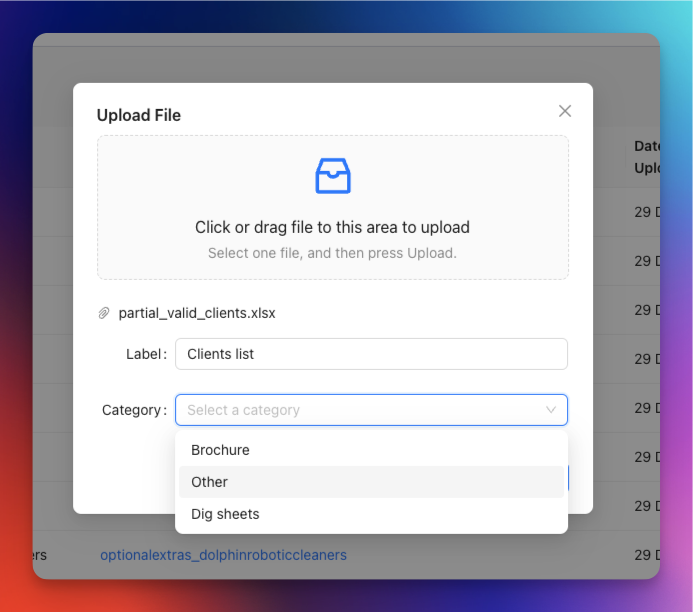
- A modal will appear with a drop zone
- Either drag and drop your file into the drop zone, or click it to browse and select a file
- After selecting your file, you’ll see:
- File name: The actual filename (displayed automatically)
- Label: A friendly name for the file (defaults to the filename, but you can customize it)
- Category: A dropdown to assign the file to a category (if categories have been configured)
- Fill in the label and select a category (optional)
- Click Upload
The modal will close and your file will appear in the table on the Files page.
Tips:
- Use descriptive labels so team members can easily identify the file’s purpose
- Assign appropriate categories to make files easier to find later
- Most file types are supported (PDF, DOCX, XLSX, images, etc.)
Setting Up File Categories
Admin Access Required
Before uploading files, it’s recommended to set up custom file categories to help organize your documents. This is done on the Workflow page, which requires admin access.
To create file categories:
- Navigate to Admin > Workflow
- Find the File Categories tab
- Click Add new category to create a new category
- Enter a category name (e.g., “Brochures”, “Manuals”, “Safety Documents”, “Warranties”)
- Continue adding as many categories as you need
- Click Save Categories to save your changes
You can add categories at any time. Categories help you:
- Organize files logically
- Filter files on the Files page
- Find relevant documents quickly when composing emails
To rename or remove a category, first move any assigned files to another category. Neptune will not save the change while files still use the existing category.
See Workflow documentation for more details