Jobs
Neptune CRM Location: Jobs
A customer record in NeptuneCRM should be treated as the source of truth for everything related to that customer. A Job is what you will use to manage all the work related to a specific build location.
You may choose to set up a job at any time in the process. Perhaps you set up a job when you’ve arranged the first visit by a sales consultant, or maybe you wait until the contract has been signed and you’re ready to start scheduling the construction work.
Usually one customer will have a single Job. However in some scenarios, you might want to create multiple jobs. For example, if your “customer” is a third party that brings you pool jobs, you can create many jobs at many different adddresses all managed as jobs under the one customer record.
Creating a job
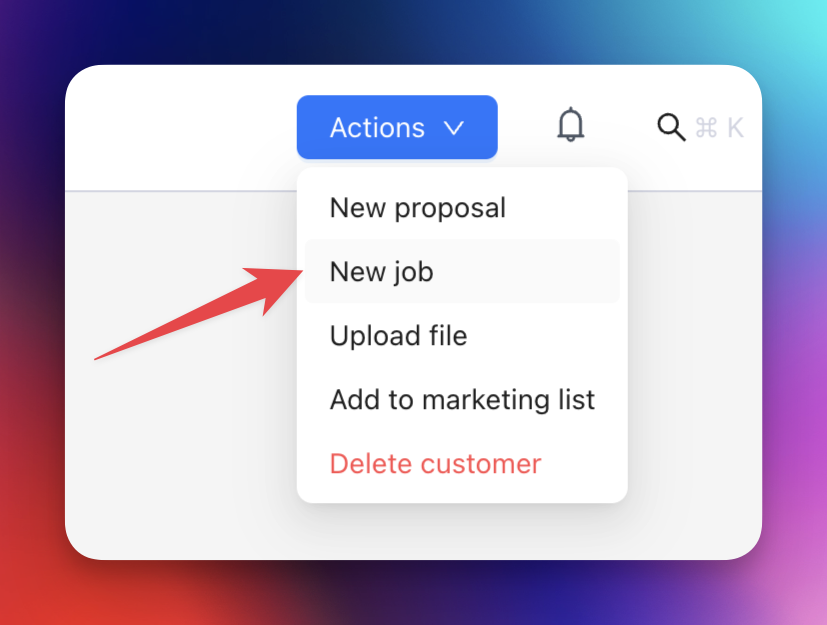
To create a new job, go to the customer record, hover over the Actions button on the top right, and select New job.
This will open a modal which contains a job name and a build address. The name is auto-created from the customer’s name and their suburb, however you can change the name of this job to whatever you like. You may not create two jobs with the same name, so you might be forced to change the name if one with the same name already exists.
The build address will also be auto populated from the customer’s address, however this too can be changed if the build address is not the same location as the address on the customer record. The address field uses the Google Places API so you need to start typing an address and then select an address from the list of suggestions.
Press Save to save this new job. The modal will close and if you go to the Jobs tab on the customer record, you will see this new job listed, as well as other jobs for this customer if there are any. Similarly if you go to the Jobs page, you will see your job listed among other jobs created for other customers.
The job card
Click into the job card by clicking on the job name, from either the jobs page or the job list on the customer record. Here you will see the basic details of the job and the linked customer. You can click back through to the customer record by clicking the customer name.
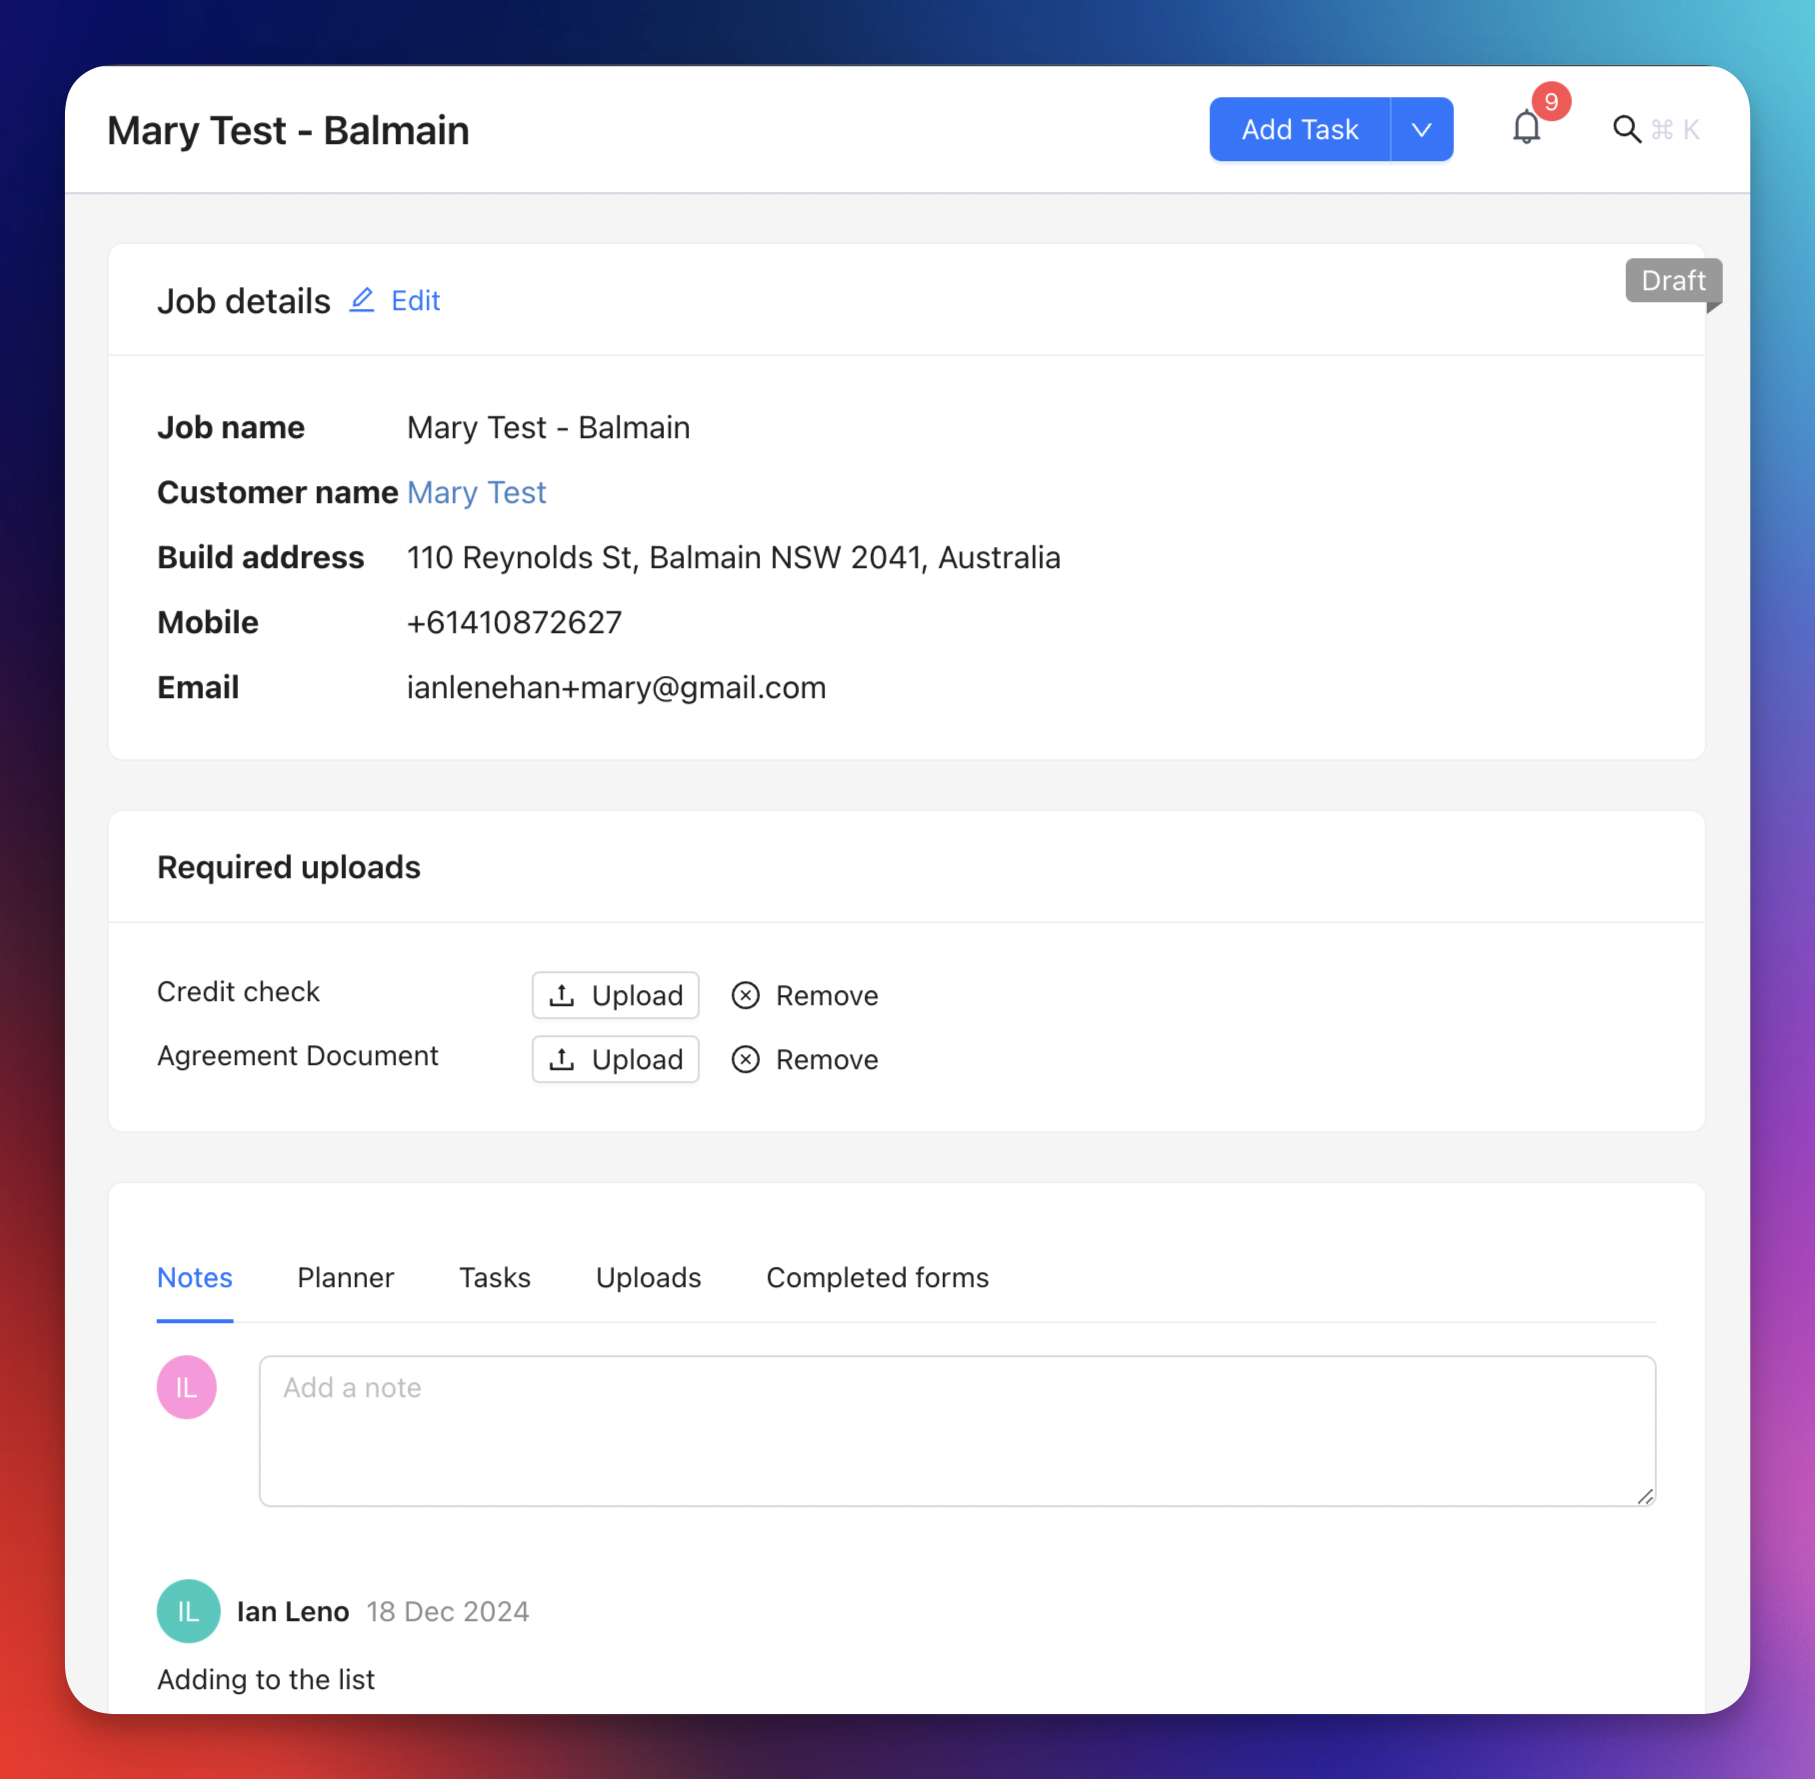
Required uploads
If your job settings have any required uploads, you will see them listed here. To upload files for a required upload, click the upload button next to the name of the document. Select your file to complete the upload. You will see when the upload has completed, the Uploads tab becomes visible and the file you just uploaded should be in there. If you uploaded a photo, you should see a preview of it which you can click on to make bigger. You should also notice that that document has been removed from the list of required uploads.
Notes
Select the notes tab and type in the text input to add your first note to the job card. The Save button will appear only after you start typing. Press it to save your note. This note also gets saved to the customer record. Click on the customer name in the job card details and go to the Comments tab. You should see the new note is there, and at the end of the row that has the new note, there is a small J button. Click in this small button to navigate back to the job card.
Planner
This provides a mini-view of the Planner but only tasks related to this job. Clicking on a grid item on this planner will open the New task drawer. The task will already be assigned to this job, as well as the user on whose tile you clicked.
Tasks
This tab provides a list view of all the tasks assigned to this job. Older tasks are hidden by default and can be viewed by toggling Show pasts tasks.
Uploads
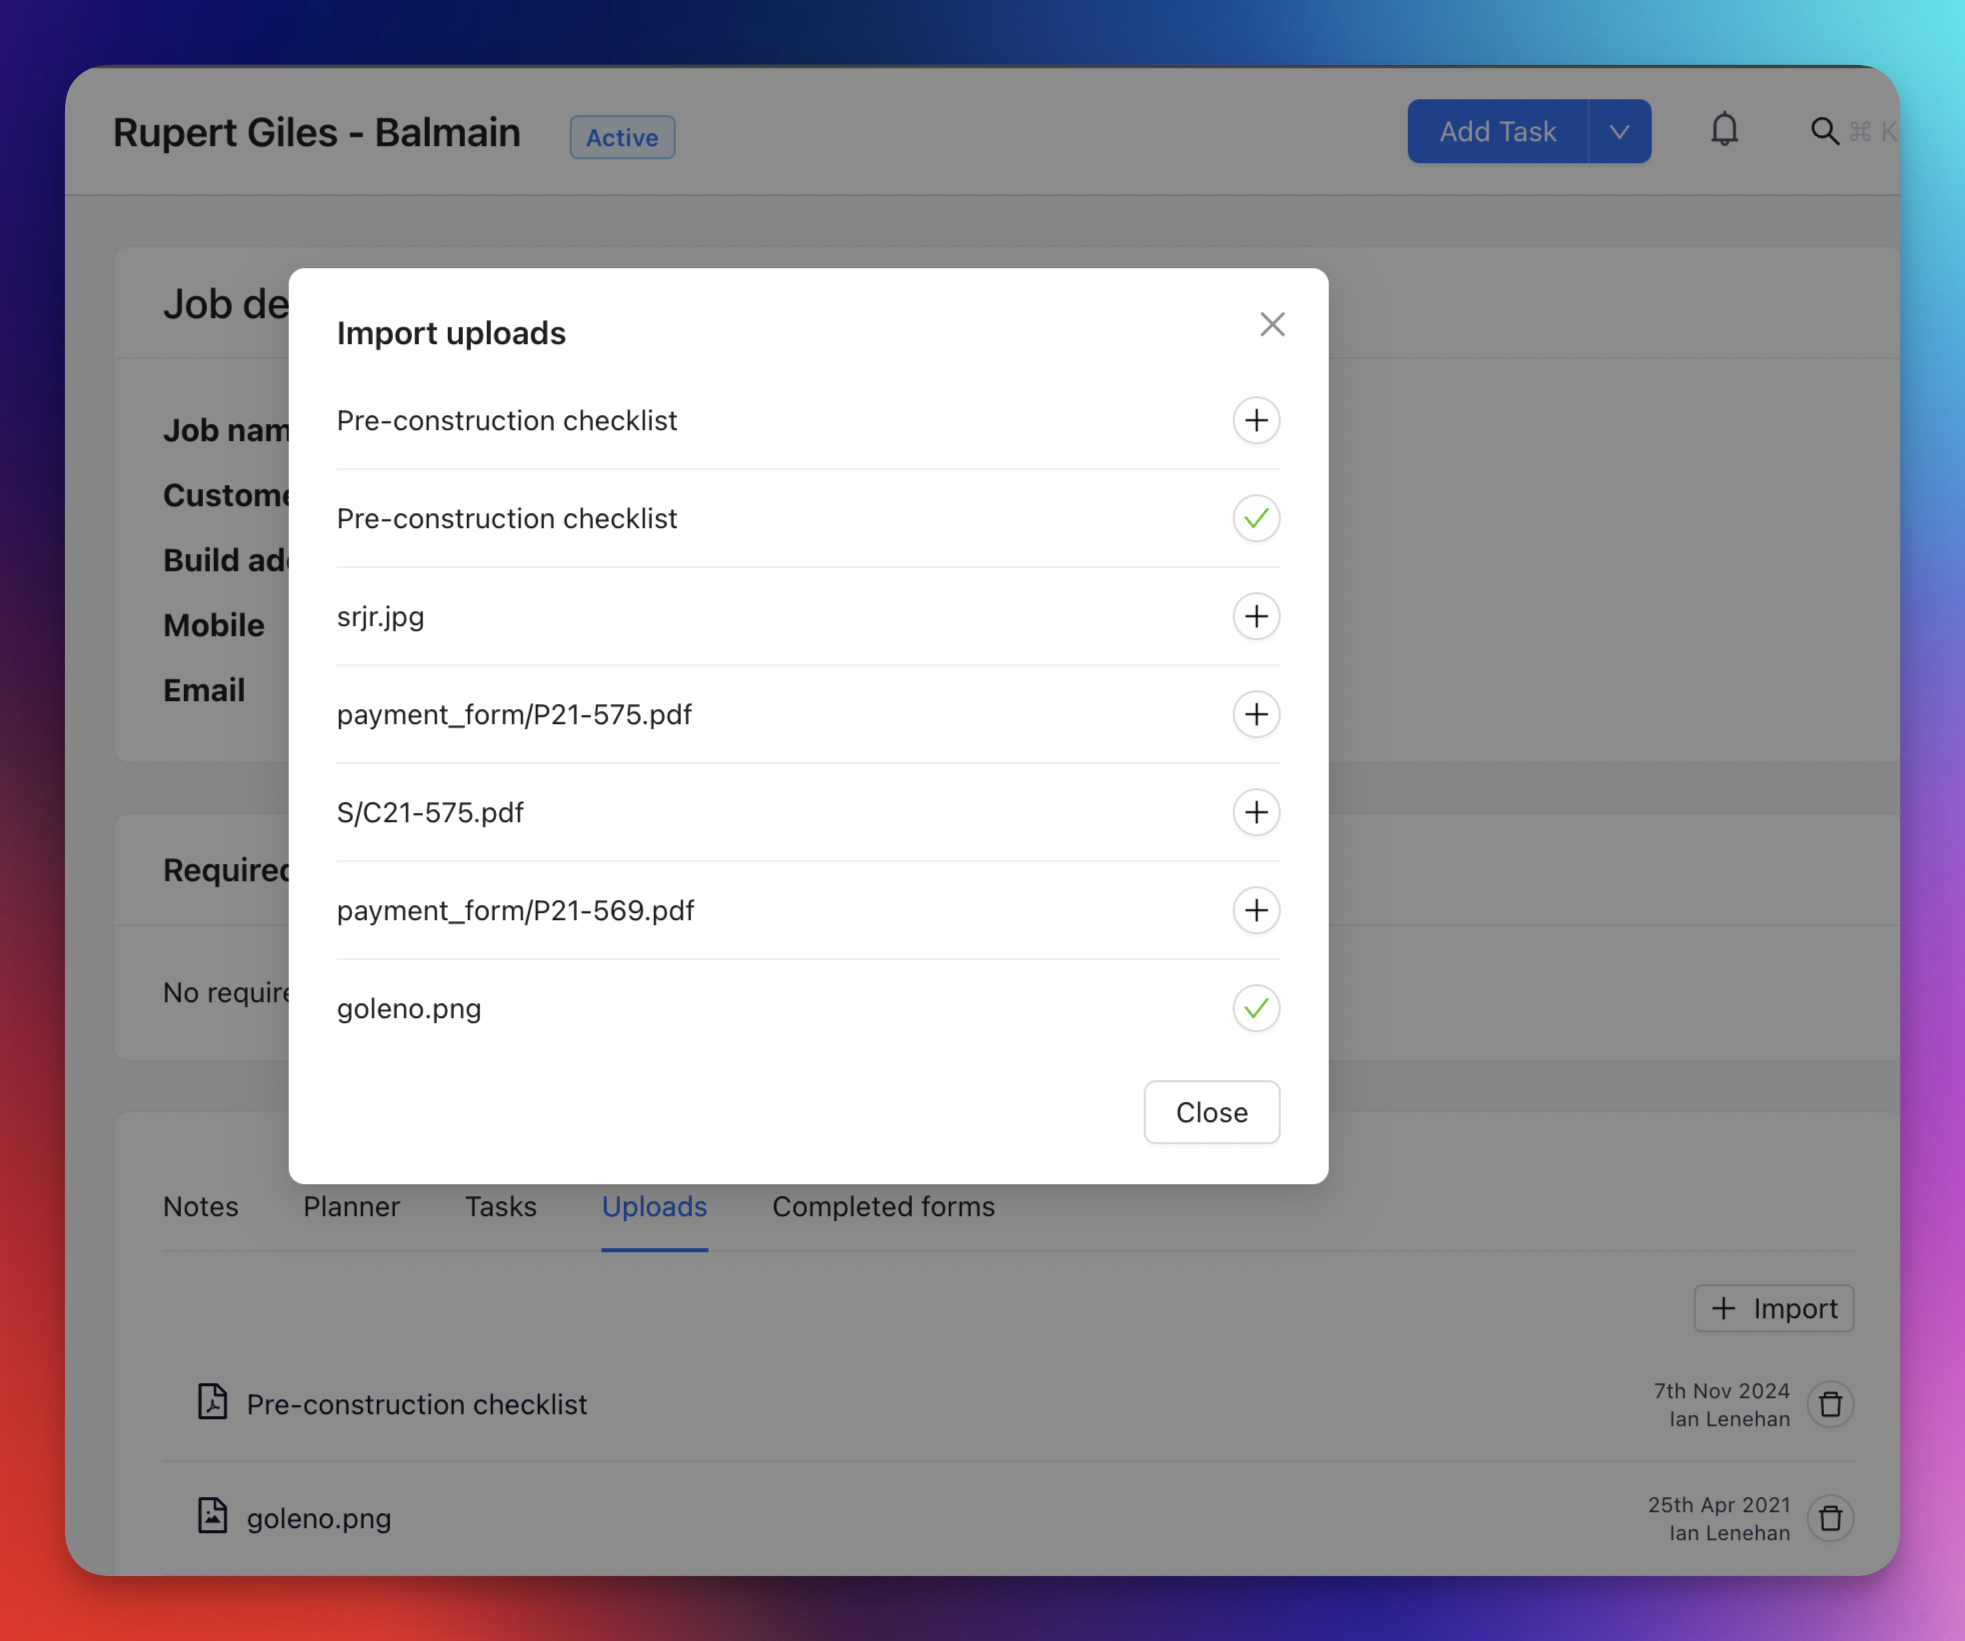
As well as the required uploads, images or documents uploaded from the job card on the mobile app will appear here. You can also import uploads from the main customer record by clicking the Import button. This will bring up a modal that contains a list of all uploads from the customer record. Those already imported will show with a green tick next to them. To import an upload to the Job card, click on the Plus icon next to the upload. Click on the green tick to remove it. Since your contractors who use the mobile app can see everything on the job card, this allows you to select which documents are available for everyone to see, and which ones you’d prefer to keep as part of the web view only. Contractors do not have access to the customer card or the web app.
Completed forms
Any forms completed by users of the mobile app will appear here, where you can review them.
Scheduling tasks
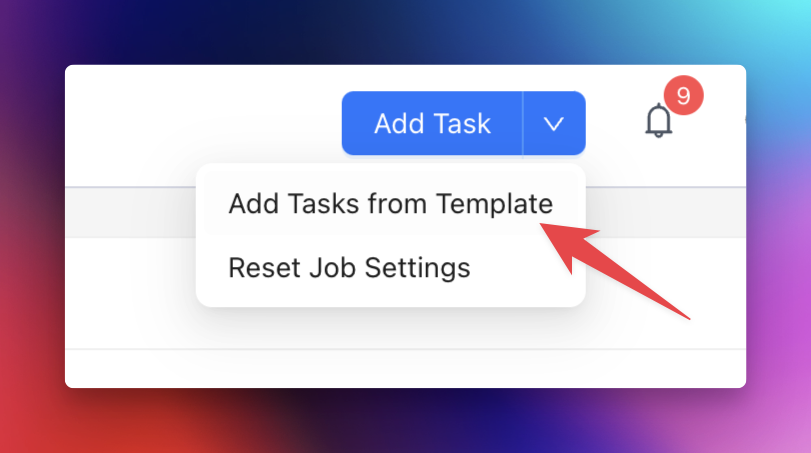
Tasks can be added to a job in a number of ways. You can add a task by clicking on an empty tile in the Planner, either from the main Planner page or the Planner tab of the job card (see above), or you can click on the Add Task button on the top right of the job card.
You can also use templates configured in Job settings from the Add Task dropdown:
- Add Task from Template: create one task from a saved Task Template.
- Run Job Template: run an ordered sequence of task templates step-by-step.
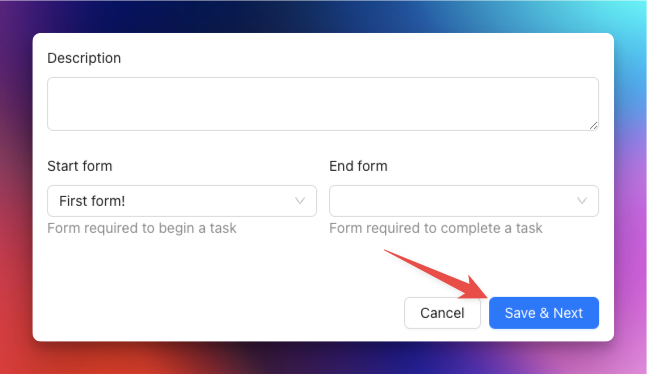
When creating a task from either template flow, Neptune pre-fills details from the selected template:
- title and description
- start/end form requirements
- default assignee (if available)
- duration-based end date when you set the start date
When running a Job Template with multiple steps:
- the button changes to Save & Next
- after saving each step, Neptune loads the next step template
- the next start date is calculated from the previous task end + gap
- if a step has a gap override, that override is used
- otherwise Neptune uses the gap from the step’s Task Template
- if Business days only is enabled on the Job Template, weekend dates are skipped
If a Job Template run is already in progress for that job, Neptune resumes where you left off. If the run is already completed, Neptune asks whether you want to start again from the beginning.
Reset job settings
The Add Task dropdown also contains Reset Job Settings. If you change Job Settings in admin, existing jobs are not updated automatically. Resetting a job applies the current organisation Job Settings to that job.
Important: this also resets template-run progress for that job. Any completed required uploads will be required again, and template runs can start over from the beginning.