Job Settings
Neptune CRM Location: Admin > Job Settings
This is only accessible to users with admin priviledges.
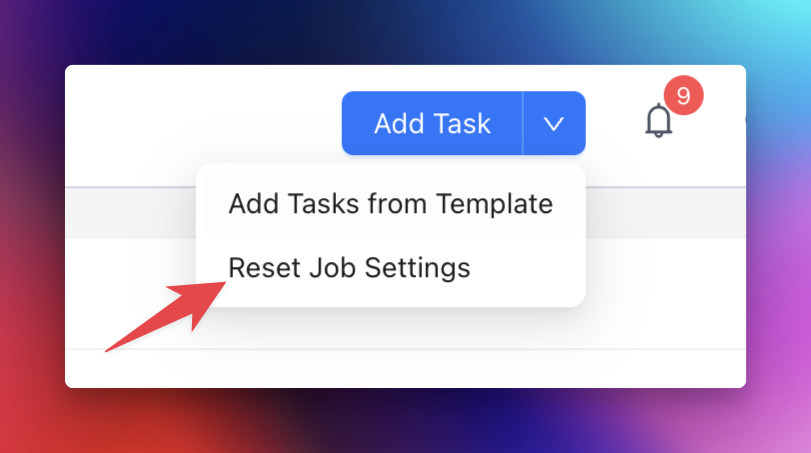
When a job is created, all job settings are copied directly onto that job. Changes to job settings will not affect jobs already created, however you can update the job settings on a job (so that they import the current job settings) by clicking on Reset Job Settings. This can be found in the Add Task dropdown menu on the job card.
Required Documents
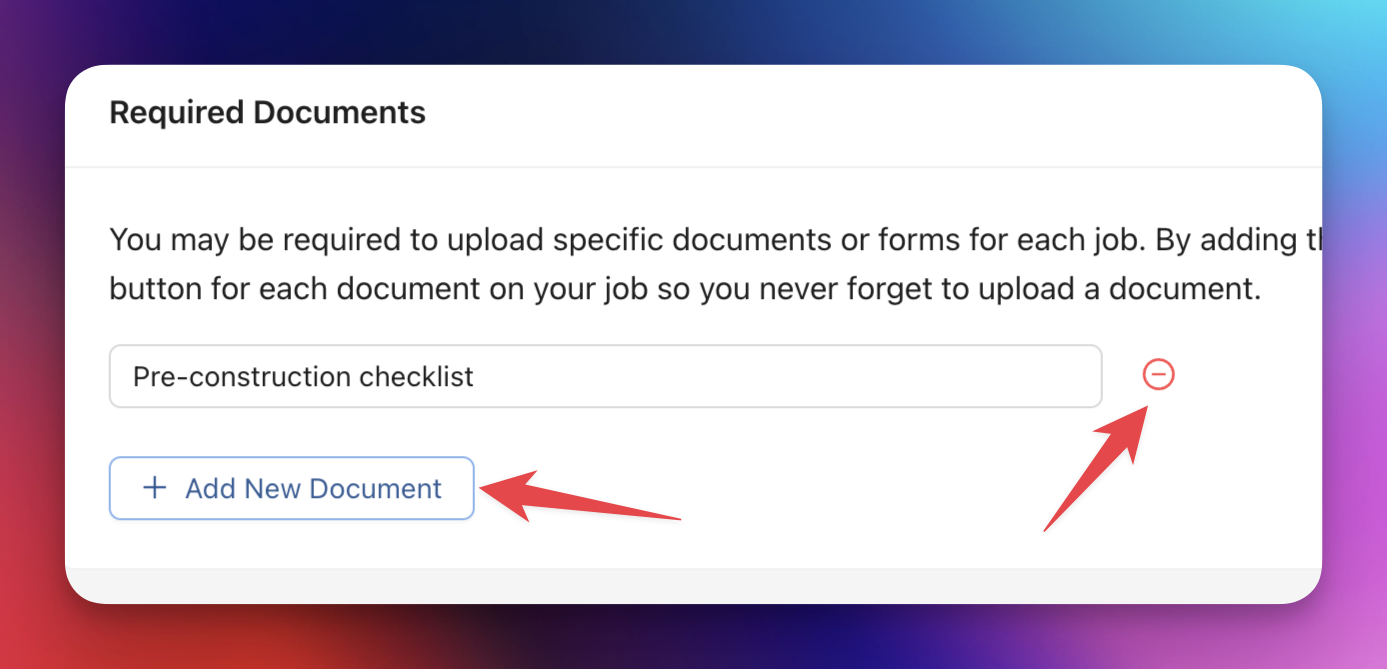
For every job, you may require the same set of documents or photos to be uploaded to Neptune. The Required Documents section is where you can define those documents.
To begin, click on the Add New Document button. This will reveal a text input field, where you can enter the name of the first required document (or upload). You can add as many required documents as you wish in your job settings. Just click on Add New Document again to create more. If you want to delete a document from this list, press the red icon next to the document name that looks like a circle with a minus symbol.
If you have added any required documents and then created a job, you will see the list of required documents on the job card, alongside an upload button for each. When you upload a file using the upload button beside one of the required documents, it saves a file with that name to the customer card and job card, and then removes the required document from the list on the job card. If you don’t need that document for a job, you can click the Remove button next to it.

Custom Forms
This is where you can create an unlimited number of forms for your staff or contractors to complete when they are on the road. Once you have created a new form, it will show up here. You can then attach any of these custom forms to any task you assign to somebody. A form can be attached to either the Start task action in the mobile app, or the corresponding Complete task action.
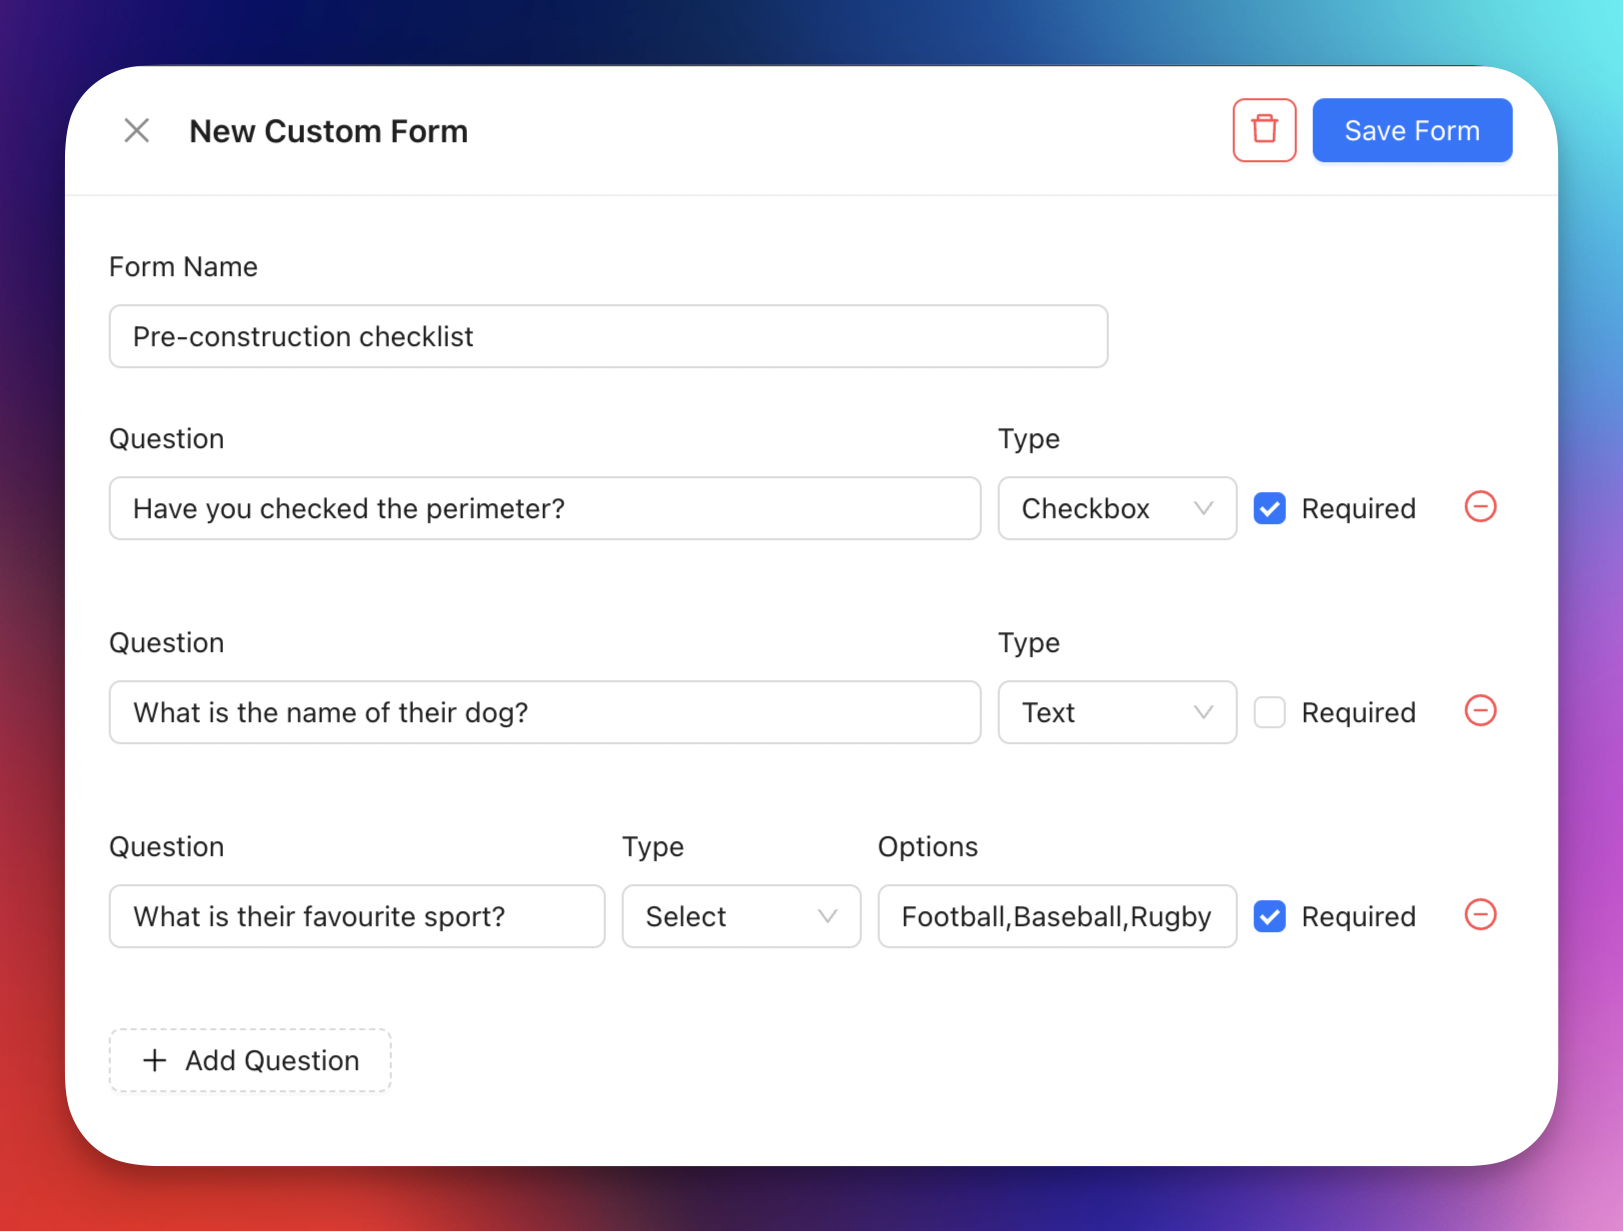
Click on Add new to create a new form. This will open up a drawer where you can create the form. First, give the form a name, for example Pre-construction checklist. Then, press Add Question to add your first item. You can indicate whether an item is a select from three types of questions:
- Checkbox: gives the user a single checkbox to indicate a yes” or “true” response. To be used for checklist style items.
- Text: allows a text response, i.e. if you need a specific answer from the user.
- Select: by providing comma-separated values with this type of question, the user is presented with a dropdown of options to choose from.
Once you have saved your new form, you will see it appear in the list of custom forms.
Task Templates
Task Templates are reusable individual task blueprints. You save task items in a template library and reuse them across many jobs and job templates.
Click Add Task Template to open a modal and save a new task template. Each template can include:
- Title: The task name (for example Excavation).
- Description: Optional extra context.
- Duration: Amount + unit (minutes, hours, or days) used to auto-calculate the task end date when creating from template.
- Gap at end: Amount + unit (minutes, hours, or days) used to suggest the next task start when running a job template sequence.
- Start form and End form: Optional custom forms required in mobile when starting/completing the task.
- Default assignee: Optional default contractor/user for this task.
Saved task templates appear in a compact list. For each item:
- Use the Edit icon to update it in a modal.
- Use the ellipsis menu to Archive or Delete.
Job Templates
Job Templates let you build an ordered sequence of Task Templates for guided scheduling on a job.
Click Add Job Template to open a drawer and define:
- Name: Template name shown in the job task menu.
- Business days only: When enabled, next-step date calculations skip weekends.
- Ordered task templates: Add, remove, and reorder steps.
- Step gap override (optional): Per step, you can override that step’s default Task Template gap. The UI shows the current default gap to help decide whether to override.
Saved job templates are shown as a compact list with:
- Edit icon (opens drawer).
- ellipsis menu for Archive and Delete.