Files
Neptune CRM Location: Files
You can store any files needed for your business on the Files page in NeptuneCRM. These might be sales brochures that you want to attach to emails you send to your leads, they might be product instruction manuals, safety guides, or anything else you require.
The categories need to be set up on the Custom Fields page, which requires admin access. See documentation
Uploading a File
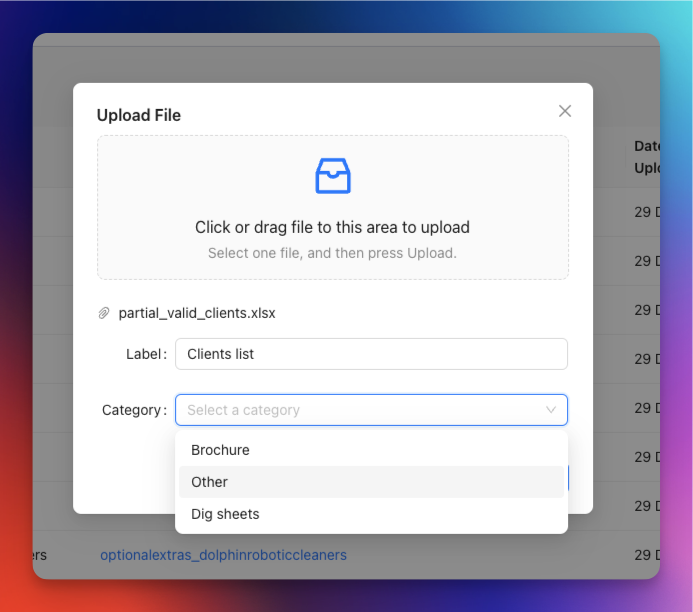
Click on the blue Upload file button on the top right of your screen. A modal will appear with a drop zone, where you can drop your file, or you can click the drop zone to select your file.
After you have selected your file, you will see the file name, plus a label field, where you can choose a friendly label for this file. It is set as the file name by default.
If you have set up categories from the Custom Fields page, you will also see a select field where you can choose to assign a Catgeory to the file. Once you have completed this, press Upload. The modal should close and your new file will appear in the table on the Files page.
Editing a file
The table on the Files page has a column at the end called Actions. For each record, there will be an edit action, which has a pencil icon. If you want to change the Label or Category of an existing file, press this pencil icon. It will show you a modal where you can change either of these values. Press Ok to save your changes.
Deleting a file
You can permanently delete a file from your list by pressing the delete icon in the Actions column. This is the icon that looks like a bin. This is irreversable.
NOTE: If you have any email templates that include this file, you will need to update the email template so it no longer tries to include a file or brochure that has been deleted.